Sunday, March 10, 2013

Brownie Rubble

Picture of Brownie Rubble Recipe


Ingredients
2 sticks plus 2 tablespoons unsalted butter, plus more for the pan
1 cup all-purpose flour, plus more for dusting
6 ounces bittersweet chocolate, chopped
2 cups sugar
3/4 cup unsweetened cocoa powder
1/2 teaspoon salt
4 large eggs, cold
2 teaspoons vanilla extract
1 cup mini marshmallows
1 cup semisweet chocolate chips
3/4 cup unsalted roasted peanuts
Directions
Line an 8-inch-square baking pan with foil, pressing it into the corners and up the sides; leave an overhang on 2 sides. Butter the foil and dust with flour. Position a rack in the lower third of the oven; preheat to 400 degrees F.

Bring 1 inch water to a gentle simmer in a medium saucepan over medium-low heat. Put the chocolate and 2 sticks plus 2 tablespoons butter in a heatproof bowl; set the bowl over the saucepan (do not let the bowl touch the water). Stir occasionally until melted and smooth. Remove the bowl from the saucepan.

Add the sugar, cocoa and salt to the bowl and stir vigorously with a wooden spoon until smooth. Add the eggs one at a time, beating well between each addition, until the batter is thick and shiny. Add the vanilla, then add 1 cup flour and mix until combined. Spread in the prepared pan.

Bake the brownies until a toothpick inserted into the center comes out with just a few crumbs, about 35 minutes. Remove from the oven and scatter the marshmallows, chocolate chips and peanuts on top. Return to the oven; continue baking until the marshmallows are golden, about 5 more minutes.

Let cool in the pan on a rack, 30 minutes. Lift the brownies out of the pan using the foil and transfer to a cutting board to cool completely before slicing.
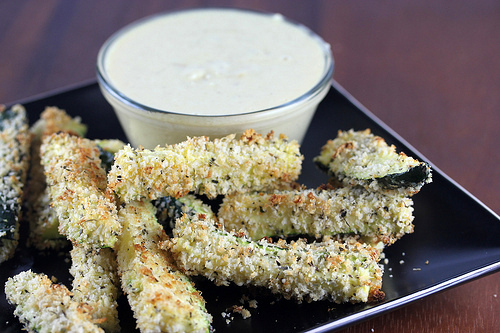
Zucchini Sticks Recipe


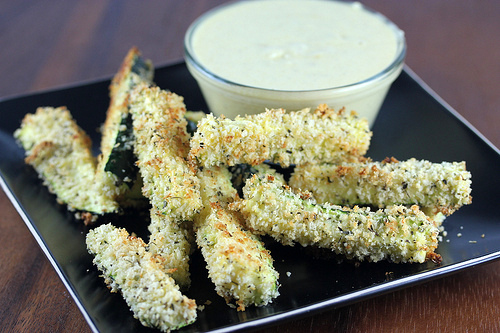
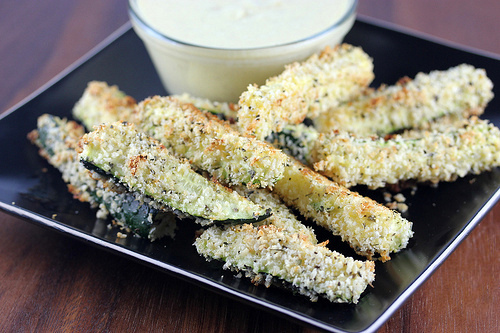
It’s that time of the year again when you more than likely have an abundance of zucchini lying around and are unsure of what to do with all of them. These zucchini sticks are a great option for using up that zucchini. They are crunchy, delicious, and best of all, they are baked. I thought about deep frying them but decided baking was a better option. I highly recommend using Panko breadcrumbs for this recipe, instead of normal breadcrumbs. Panko bread crumbs will help to make sure your zucchini sticks come out of the oven nice and crispy. These zucchini sticks are also served with a delicious onion dip. If you don’t want to use the onion dip, ranch dressing would be a good option, or you can serve with without any dressing at all. This recipe is perfect to be served as an appetizer or snack for parties or to go with a dinner. Enjoy. Adapted from King Arthur Flour. 

Ingredients:
Onion dip-
1 tablespoon butter
1 medium sweet onion (peeled and sliced)
2 tablespoons cider vinegar
1 tablespoon prepared mustard
1 cup mayonnaise
salt and pepper (to taste)
Zucchini Sticks-
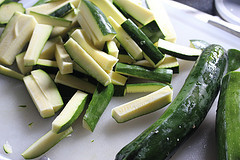
3 medium zucchini (cut into 3inch long sticks)
1 tablespoon salt
1 cup Panko bread crumbs
½ cup freshly grated Parmesan cheese
1 tablespoon Italian seasoning
2 large eggs (lightly beaten)
olive oil cooking spray

Cooking Instructions:

Step 1:
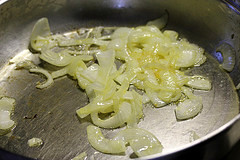
 To make the onion dip- melt butter in a medium skillet over medium heat. Add sliced onions and cook, stirring occasionally until the onion has softened and then become caramelized (about 10 to 15 minutes). Once the onions are medium brown remove from the heat and stir in cider vinegar. Place onions and vinegar mixture into a food processor. Add honey and mustard and blend until smooth. Stir in the mayonnaise and salt and pepper to taste. Mix well. Cover and refrigerate until ready to serve.
Step 2: In a pie dish combine Panko bread crumbs, Parmesan cheese, and Italian seasoning. Set aside. Preheat the oven to 425 degrees. Line a baking sheet with parchment and spray the parchment with olive oil cooking spray. In a small bowl lightly beat together 2 eggs. Dip the stick first in the egg mixture and then roll in the panko breadcrumb mixture. Place the sticks onto the prepared baking sheet.
Step 3: Place into the oven and bake sticks at 425 degrees for 12 minutes. After 12 minutes turn over and bake for an additional 8 minutes or until golden brown and crisp. Serve immediately with the sweet onion dip.
(Makes About 3 Dozen Zucchini Sticks)

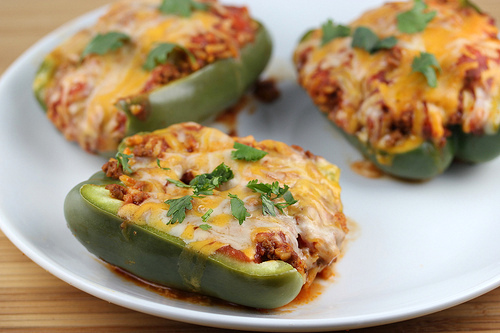
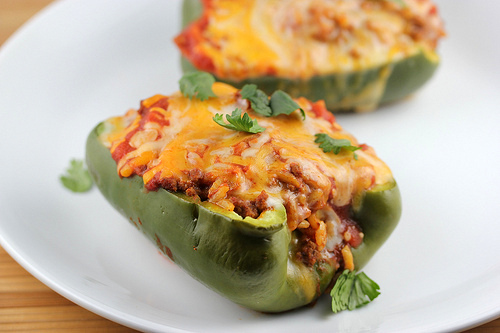
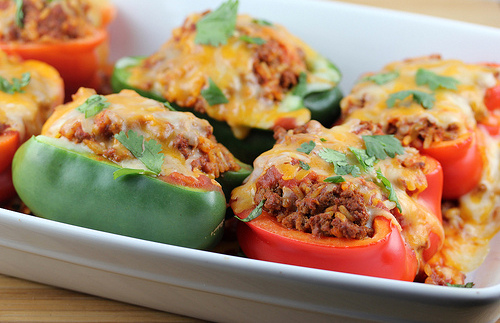
Mexican Stuffed Peppers Recipe


These stuffed peppers are packed with Mexican inspired flavors to create a delicious meal for any night of the week. These peppers are stuffed with ingredients such as taco meat and rice. This recipe gets a lot of its flavor from taco seasoning and spices such as garlic salt, chili powder, and black pepper. You can add additional topping or filling ingredients as well to these peppers. Some good choices would be black beans, corn, sour cream, guacamole, and black olives. This recipe calls for steaming the peppers but the entire cooking process could be done in the oven, the baking time will just be longer to get the peppers tender. If you are looking for an excellent recipe for the oven, give this one a try. Enjoy.

Ingredients:
1lb ground beef
1 (1 ounce) package taco seasoning mix
¾ cup water
2 teaspoons chili powder
½ cup cooking rice
¼ teaspoon salt
¼ teaspoon garlic salt
1/8 teaspoon ground black pepper
2 (8 ounce) cans tomato sauce (divided)
3 large red bell peppers (or green)
1 (8 ounce) bag shredded Colby-jack cheese

Cooking Instructions:

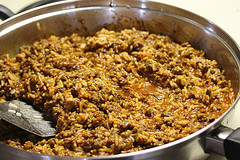
Step 1: Preheat the oven to 350 degrees. Grease a 9×13 inch baking dish. In a large skillet over medium heat brown the ground beef, breaking it apart into crumbles as it cooked (about 8 minutes). Drain excess fat. Stir in taco seasoning, water, chili powder, cooked rice, salt, garlic salt, black pepper, and 1 can of tomato sauce. Mix until thoroughly combined. Bring to a boil, reduce heat to low and simmer for 20 minutes.
Step 2: While the ground beef is simmering, cut bell peppers in half lengthwise, and remove the steams, membranes, cores, and seeds. Place a steamer inset into a large saucepan, and fill with water to just below the bottom of the steamer. Cover and bring the water to a boil over high heat. Place the peppers into the steamer insert, cover the pan, and steam until just tender (about 3-5 minutes).
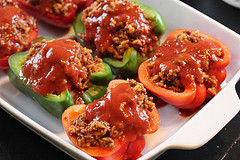
Step 3: Place steamy peppers into the prepared baking dish and fill each pepper lightly with the meat filling. Spoon the remaining can of tomato sauce over each pepper. Cover the baking dish with aluminum foil.
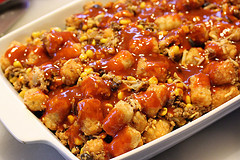
Step 4: Place into the oven and bake at 350 degrees until the peppers are tender and the filling is hot (about 25 to 30 minutes). During the last few minutes of cooking, remove the foil and top each pepper with Colby-jack cheese. Bake until the cheese has melted.
(Makes 6 Servings)

Jalapeno Chicken Bites Recipe


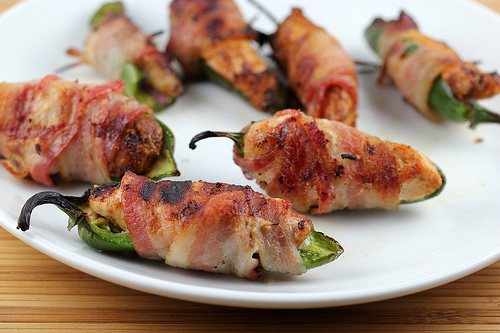
Another one of my favorite appetizers to prepare in the oven or on the grill for football season are these jalapeno chicken bites. These appetizers consist of jalapeno peppers stuffed with red onion and seasoned chicken strips that are wrapped in bacon. If you would prefer you can wrap the stuffed peppers with ham or prosciutto instead of the bacon. When you are cutting the chicken pieces you will have to guess the size to cut them based on how big your jalapeno peppers are. It is okay if they are a little too big; just tuck in whatever over laps. There are a lot of different ingredients you could add to this recipe based on your taste. A good idea would be to add a small slice of cheese or add some cream cheese into the peppers. You can serve these wrapped peppers with blue cheese or ranch dressing if you would like. Enjoy.

Ingredients:

1lb boneless skinless chicken breasts
1 tablespoon garlic powder
1 tablespoon onion powder
1 tablespoon ground black pepper
2 teaspoons seasoning salt
1 teaspoon paprika
1 small purple onion (cut into strips)
15 jalapeno peppers (halved and seeded)
1lb thin sliced bacon (or ham, or prosciutto)
blue cheese salad dressing (optional)
Cooking Instructions:

Step 1: Preheat the oven to 350 degrees. Cut the chicken breasts into small strips that will fit the size of your pepper (the size is going to depend on how big your peppers are, so use your best judgment. If they are a little bigger than the pepper, simply tuck in whatever over laps).
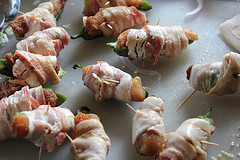
Step 2: In a large sealable plastic bag, combine garlic powder, onion powder, ground black pepper, seasoned salt, and paprika. Add chicken strips and shake to coat. Place an onion strip and a chicken strip into each jalapeno half. Wrap each pepper with a slice of bacon, covering the entire pepper. Secure the bacon onto the pepper using a toothpick.  Place the wrapped pepper onto a lightly greased baking sheet. Repeat until all of the peppers are stuffed and wrapped.
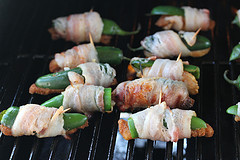
Step 3: Place the baking sheet into the oven and bake the peppers at 350 degrees for 20-25 minutes or until the bacon is crispy and the chicken is fully cooked (the internal temperature has reached 165 degrees). These can also be grilled, by lightly spraying the grill grates and heating the grill to medium high heat.  Place the peppers onto the grill and then grill the peppers for 20-25 minutes until the bacon is crispy and the chicken is fully cooked (the internal temperature has reached 165 degrees).
Step 4: Serve with blue cheese or ranch dressing if desired.

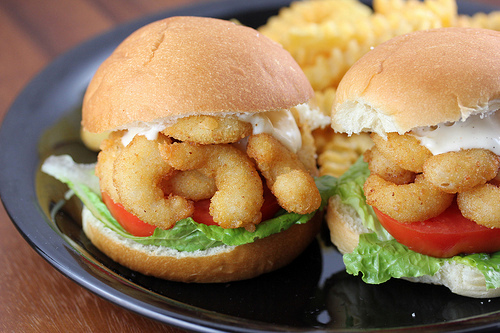
Popcorn Shrimp Sliders Recipe


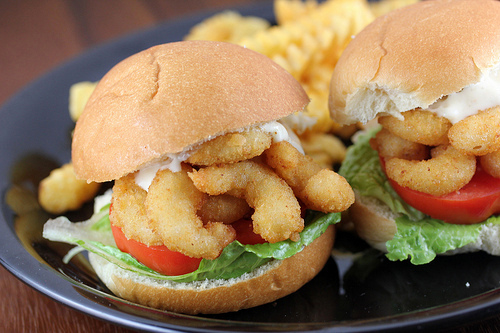
I am always looking for new sliders recipes for game day so when I came across this recipe by Seapak for popcorn shrimp sliders, I knew I had to give it a try. What is really great about these sliders is that they are so easy to prepare. Using frozen popcorn shrimp really saves times. The popcorn shrimp can either be baked or deep fried, just cook them according to the package directions. This recipe also includes homemade tartar sauce which is a combination of mayonnaise, relish, lemon juice, salt and pepper. What these sliders really reminded me of was a delicious fish sandwich. This is another great recipe idea to prepare for football season. Enjoy.

Ingredients:
1 (20 oz.) package frozen popcorn shrimp
slider buns (or dinner rolls)
butter (for spreading)
romaine lettuce
small tomato slices (or roma tomato slices)
Tartar sauce-
1 cup mayonnaise
2 teaspoons lemon juice
1 tablespoon pickle relish
salt and pepper (to taste)
Cooking Instructions:

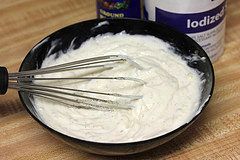
Step 1: In a bowl combine mayonnaise with the lemon juice, pickle relish, salt and pepper. Mix well. Cover and refrigerate until needed.
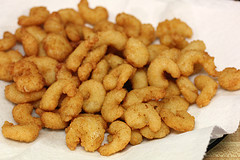
Step 2: Cook popcorn shrimp according to package directions by either baking or deep frying the shrimp until fully cooked. If deep frying, drain on paper towels.
Step 3: Cut the slider buns in half. Lightly spread butter onto the cut side of each slider bun. Heat a large skillet to medium heat. Place slider buns, cut side down into the pan and cook until lightly toasted and golden brown on the bottom. On the bottom half of the each slider bun place a piece of romaine lettuce, 1 tomato slice, a few popcorn shrimp, and tartar sauce. Place the top half of the bun onto the slider.

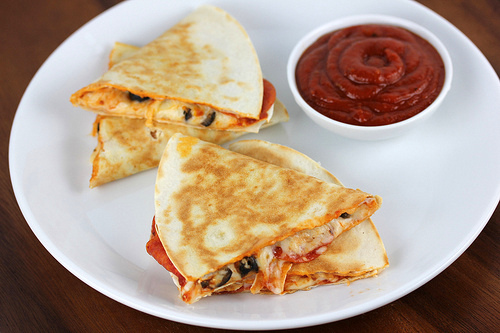
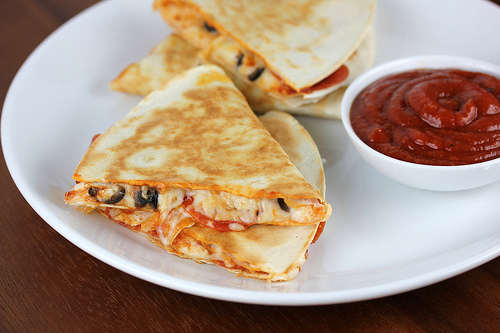
Pizza Quesadillas Recipe


These pizza quesadillas are one of the easiest and quickest types of quesadillas you will ever make. There is not much involved in this recipe, just a tiny amount of prep work and then frying the quesadilla itself. These quesadillas have your favorite pizza ingredients such as pizza sauce, pepperoni, mozzarella cheese, and sliced black olives. You can add whatever types of pizza ingredients you like such as chopped green pepper and onion. You could also add some cooked Italian sausage if you would prefer. Another good option would be to sprinkle a little Italian seasoning on these quesadillas for even more flavor. This recipe is perfect for an appetizer or for a dinner any night of the week. It is also a great option for a game day party. Enjoy.

Ingredients:
½ cup pizza sauce
6 (7 inch) flour tortillas
8 ounces shredded mozzarella cheese
½ cup sliced pepperoni
3 tablespoons sliced pitted black olives
butter
Cooking Instructions:

Step 1:
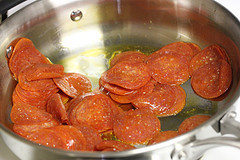
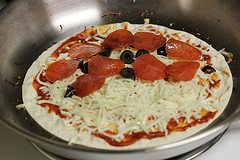
 Lightly butter one side of each flour tortilla. Heat a large skillet to medium high heat. Place the tortilla into the pan butter side down. Spread a thin layer of pizza sauce on half of a tortilla. Sprinkle a layer of cheese over the pizza sauce. Top with pepperoni and black olives. Cook until the cheese has melted and the bottom has browned.
Step 2: Fold the tortillas in half and press down the edges gently.
Step 3: Remove from pan. Repeat until all of the quesadillas are cooked. Slice each quesadilla into three triangles.
(Makes 6 Servings)

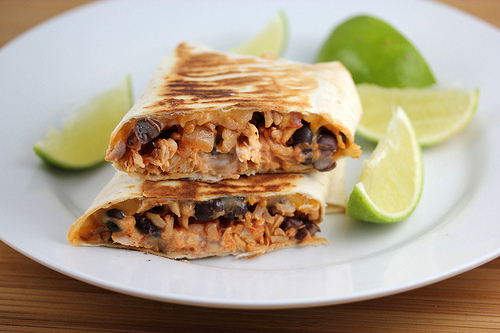
Chicken Grilled Stuffed Burrito Recipe


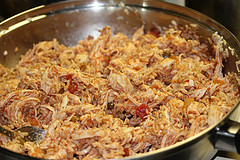
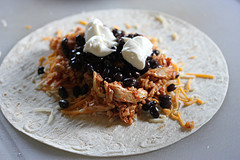
One of my favorite things to get from Taco Bell is their chicken grilled stuffed burrito. When I came across this recipe and I saw that it was very similar to the burrito I get at Taco Bell, I knew I had to give it a try. What makes it so similar is that the burrito is cooked on both sides in the frying pan until it is browned. This burrito is loaded with ingredients such as shredded chicken, rice, black beans, and sour cream. You can add additional ingredients as well, some good options maybe be guacamole or pico de gallo. You can adjust the amount of heat in these burritos by the spiciness of the salsa you choose. I personally prefer my burritos not to be too spicy so I just used mild salsa. These burritos are very easy to make and are perfect for dinner any night of the week. Enjoy. Adapted from Elizabeth Lou & Company

Ingredients:

1 cup cooked brown rice
1 cup cooked chicken (shredded)
1 can black beans (drained and rinsed)
juice of 1 lime
½ cup salsa
½ tablespoon chili powder
½ teaspoon garlic salt
2 cups shredded Monterey Jack cheese
Sour cream
4 large flour tortillas
Cooking Instructions:

Step 1: In a sauce pan mix cooked brown rice together with chili powder and garlic salt. Add cooked shredded chicken, salsa and black beans. Cook until heated through. Sprinkle cheese over the tortillas, leaving ½ inch border around the edges. Add dollops of sour cream over the cheese.  Arrange some of the chicken and rice mixture down the center of each tortilla. Bring the sides of the tortilla toward the center of the filling. Fold the bottom of the tortillas up over the filling and continue to roll until the burrito closes. Spray the seam side of each burrito lightly with cooking spray.
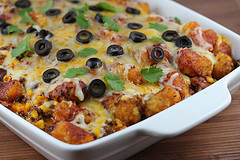
Step 2: Heat a large skillet or griddle over medium high heat. Place wraps into the skillet seam-side down and cook until golden brown and crisp on the bottom, turn over and cook until golden brown on the other side (about 2-3 minutes per side).
(Makes 4 Servings)

Jalapeno Popper Rolls Recipe


Jalapeno Popper Rolls Recipe


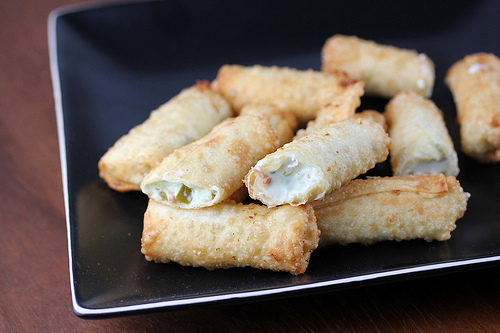
These jalapeno poppers rolls are a delicious appetizer that consist of jalapeno popper ingredients rolled up inside of wonton wrappers. They are very similar in appearance to small egg rolls. This appetizer is extremely easy to prepare in large batches for game day. If you are using a deep-fryer you should be able to fry several of these at a time. Some of the filling ingredients in this recipe include jalapeno peppers, Monterey jack cheese, cream cheese, green onions, and bacon bits. I used cooked crumbled bacon instead because I prefer the flavor a little better. It does require a little time and effort but roll the cream cheese mixture into each wonton wrapper but it is well worth it. If you love jalapeno poppers give this recipe a try. Enjoy.

Ingredients:

1 (8 ounce) package cream cheese (softened)
1 cup Monterey jack cheese (shredded)
1 (4 ounce) can jalapeno peppers (diced)
1 teaspoon fresh garlic (minced)
3 green onions (diced)
1 tablespoon bacon bits (or more, to taste)
ground black pepper (to taste)
1 (16 ounce) package wonton wrappers
1 egg
1 quart vegetable oil (for frying)
Cooking Instructions:

Step 1: In a medium bowl mix together cream cheese, Monterey jack cheese, jalapeno peppers, garlic, green onions, and bacon bits. Season with a little black pepper.  Beat an egg in a small bowl.
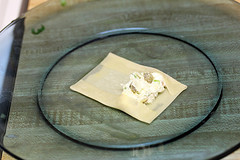
Step 2: Place about 1 teaspoon of the cream cheese mixture into the center of a wonton wrapper. Fold over the left and right corners to the middle. Using a brush or the bottom of a spoon, brush the beaten egg on the edges of the wonton wrappers. Finish rolling up tightly and secure to make sure there are no leaks. Repeat until all of the wonton wrappers are used or the cream cheese mixture is gone.

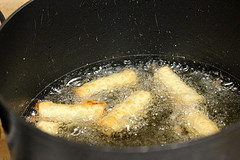
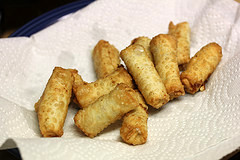
Step 3: In a large skillet heat oil over medium-high heat (these can also be cooked in the deep-fryer at 375 degrees). Drop 3-4 of the rolled wontons into the oil at a time, and quickly fry, turning once until they are golden brown. Drain on paper towels. Repeat until all of the jalapeno popper rolls are fried.
(Makes 15 Servings)

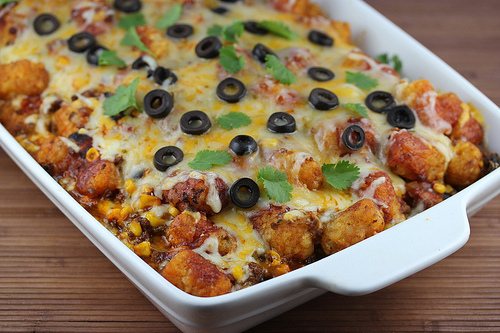
Taco Tater Tot Bake Recipe


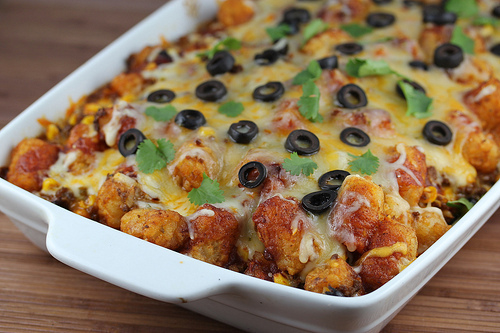
This taco tater tot bake combines tater tots into a Mexican style casserole that makes a delicious meal for any night of the week. During the winter months casserole dishes are among my favorite things to make for dinner. This specific casserole consists of ingredients such as taco meat, green chilies, corn, black beans, and Mexican cheese. The casserole also gets a lot of its flavor from enchilada sauce. If you would prefer you can add additional toppings to this recipe, some good options might be salsa and sour cream. This taco tater tot bake is extremely easy to prepare if you are short on time. Enjoy. Adapted from Cullys Kitchen.
Ingredients:
1lb ground beef
1 small onion (diced)
1 garlic clove (minced)
1 small can black olives (sliced)
1 (1 ounce) package taco seasoning mix
1 (16 ounce) bag frozen corn
1 (4 ounce) can green chilies (diced and drained)
1 (12 ounce) can black beans (drained and rinsed)
1 (16 ounce) bag shredded Mexican cheese blend
1 (16 ounce) package frozen tater tots
1 (10.5 ounce fluid ounce) can enchilada sauce
Cooking Instructions:

Step 1: Preheat the oven to 375 degrees. Spray a 9×13 inch baking dish with cooking spray. Heat a skillet to medium high heat. Add ground beef, garlic, and onion and cook while breaking the meat apart with a spoon or spatula until the ground beef is completely browned. Drain off any excess fat. Add taco seasoning mix, green chilies, frozen corn, and black beans to the ground beef. Cook until heated through.
Step 2: In a large bowl combine ground beef mixture, ¾ of the Mexican cheese blend, and all of the tater tots. Stir well to combine.

Step 3: Pour about 1/3 of the enchilada sauce into the bottom of the prepared baking dish. Add the tater tot mixture to the baking dish and lightly pat the mixture down into a solid, even layer. Pour the remaining enchilada sauce over the tater tots.
Step 4: Place into the oven and bake at 375 degrees for 40 minutes. During the last few minutes of baking, top the casserole with the remaining Mexican cheese blend and the sliced black olives. Return to the oven and bake until the cheese is melted and bubbly.
(Makes 6 Servings)

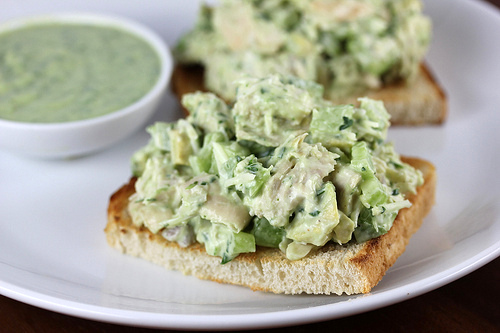
Avocado Chicken Salad Recipe


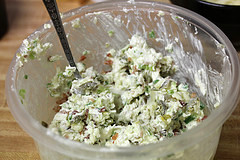
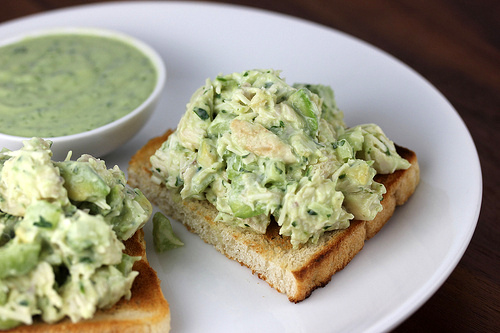
This avocado chicken salad makes a great lunch or dinner that is easy to prepare. There are many ingredients in this recipe that blend together well to give these sandwiches a delicious flavor. The avocado dressing really makes this recipe great. The dressing is avocado based, but also has the flavor of mint in it. The chicken mixture itself uses ingredients such a celery, shallot, avocado, parmesan cheese, and dry ranch dressing mix. You can cook the chicken any way you like, but what I did was bake the chicken breasts and then sliced them into small chunks. This recipe is a great way to use up any leftover cooked chicken you may have. If you are looking for a great recipe for chicken salad sandwiches, give this one a try. Enjoy.

Ingredients:
Avocado Dressing-
2 avocados (peeled, pitting, and sliced)
1 cup buttermilk
1 green onion
¼ cup fresh  parsley (packed)
¼ cup fresh mint leaves (packed)
3 tablespoons fresh lemon juice
½ cup water
salt and pepper (to taste)
Chicken Salad-
3 ¼ cups shredded cooked chicken (about 2 boneless skinless chicken breasts)
2 celery stalks (finely chopped)
1 large shallot (finely chopped)
1 avocado (peeled, pitting, and diced small)
3 tablespoons mayonnaise
1 teaspoon Hidden Valley  dry ranch dressing mix
¾ cup Avocado dressing
½ cup shredded parmesan cheese
salt and pepper (to taste)
4 large sliced of sourdough bread (toasted)
Cooking Instructions:

Step 1:
 In a food processor or blender combine 2 avocados, buttermilk, green onion, parsley, mint, lemon juice, water, and salt and pepper. Pulse until smooth. This will keep for up to 3 days in the refrigerator.
Step 2: In a medium bowl combine chicken, celery, shallot, 1 avocado, mayonnaise, dry ranch dressing, and parmesan cheese. Season with salt and pepper and toss to combine. Serve on toasted sourdough bread. You can use the leftover avocado dressing for a spread on the sandwiches.
(Makes 4 Servings)

Twix Brownies Recipe


Twix Brownies Recipe


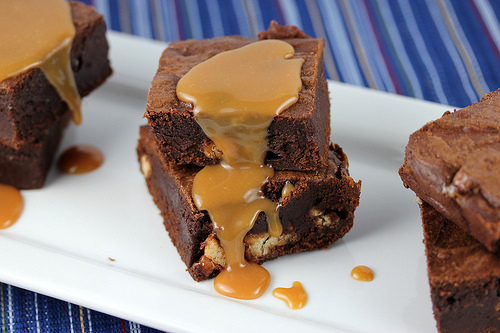
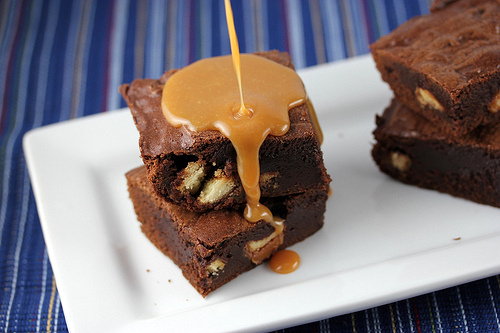
One of my favorite things to prepare for a snack or dessert is brownies. When I saw this recipe for Twix brownies, I knew I had to give it a try. What I found great about these brownies is that there are very few ingredients and that they look incredibly moist. I am not a big fan of dry brownies and these brownies did come out with a very moist texture. Chopped Twix candy bars are layered right into the batter mixture in the pan. For even more amazing and sweet flavor and caramel sauce is poured over the brownies for serving. Even if you didn’t want to make the caramel sauce, the brownies would still be delicious even without it. It is important to make sure that you allow the brownies to cool completely before cutting them because they are very moist. Also, the caramel sauce should be served over the brownies immediately. These Twix brownies are perfect for the upcoming Holidays. Enjoy! Adapted from My Baking Addiction.
Ingredients:
4 ounces unsweetened chocolate (coarsely chopped)
¾ cup unsalted butter (cut into cubes)
1 ¼ cups sugar
3 large eggs
1 teaspoon pure vanilla extract
¼ teaspoon salt
1 cup all-purpose flour
12 Fun Size Twix Bars (each cut into thirds)
Caramel Sauce-
10 individually wrapped caramel candies
2 tablespoons heavy cream
Cooking Instructions:

Step 1: Preheat the oven to 350 degrees. Line an 8×8 inch baking pan with aluminum foil and spray with nonstick cooking spray. In a large microwave safe bowl add chocolate and butter. Microwave on medium (50% power) for 3-4 minutes or until the butter has melted. Stir until the chocolate has melted. Whisk in sugar, eggs, vanilla, and salt. Gradually add flour, stir until just combined.
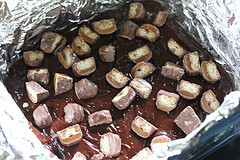
Step 2: Spread ½ of the batter into the prepared baking pan. Add an even layer of the chopped Twix candy bars and pour the remaining brownie batter over the Twix. Place into the oven and bake for 30-35 minutes at 350 degrees. Make sure to not over bake the brownies.
Step 3: Remove from the oven to a cooling rack and allow the brownies to cool completely. Just before serving, cut the brownies, and prepare the caramel sauce.
Step 4: To make caramel sauce- Unwrap the caramel candies. Place the unwrapped caramel candies and heavy cream into a microwave-safe bowl. Microwave on 50% power in 30-second increments until the caramels begin to melt. Stir frequently. Continue microwaving and stirring until the mixture becomes smooth and creamy. Drizzle over each brownie and serve.

Baked Chimichangas Recipe


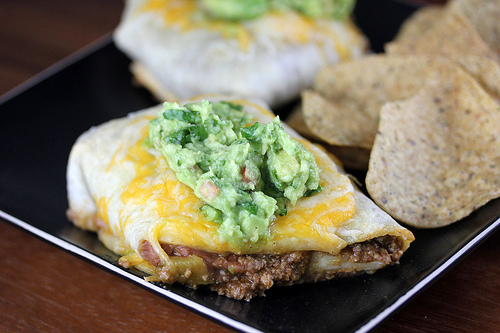
I love frying chimichangas but they are also great when they are baked in the oven. Frying in hot oil can be dangerous and time consuming and this recipe eliminates all of that by using the oven to cook these delicious chimichangas. What’s also great about this recipe is that it uses ground turkey instead of ground beef. If you have never made chimichangas before, they are not very difficult to prepare. A seasoned turkey mixture is rolled up into small burritos with refried beans and cheese. If you are not a big fan of refried beans, it is okay to leave them out. After you have finished rolling the chimichangas, they are brushed with butter and then baked in the oven. There are a lot of good options to use for toppings such as salsa, sour cream, guacamole, lettuce, and tomato. Enjoy.

Ingredients:
1 1/2lbs ground turkey
1 (1.25 ounce) packet taco seasoning
1 ¼ cups water
1 teaspoon ground cumin
2 teaspoons fresh oregano (chopped)
2 tablespoons fresh cilantro (chopped)
2 green onions (chopped)
1 (4 ounce) can diced green chilies
2 cups shredded Coly-jack cheese
1 (16 ounce) can refried beans
6 large flour tortillas
4 tablespoons melted butter
Cooking Instructions:

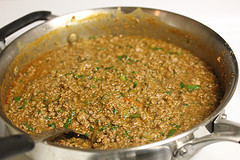
Step 1: Preheat the oven to 450 degrees. In a large skillet add ground turkey and brown over medium high heat. Add the taco seasoning and stir. Add the water and stir. Reduce the heat to medium-low and simmer until the liquid has reduced by 2/3.
Step 2: Add cumin, oregano, cilantro, green onions, and green chilies. Simmer until the rest of the liquid has evaporated.
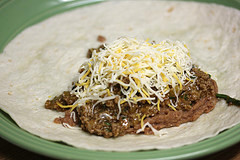
Step 3: In a small saucepan heat the refried beans until warm, smooth, and easy to spread. Warm the tortillas according to package directions. Lay a tortilla onto a flat surface (such as a cutting board), spread a thin layer of refried beans into the center of the tortilla, top with the meat filling mixture, and sprinkle some cheese over the meat. Roll up the tortillas while tucking in the sides. Place onto a lightly greased baked sheet, arranged so that they are not touching. Repeat until all of the tortillas are rolled.

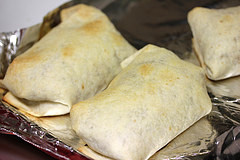
Step 4: Brush the chimichangas on the tops and sides with melted butter. Place into the oven and bake for 15-20 minutes or until golden brown and crisp. During the last few minutes of cooking top each tortilla with remaining Colby-jack cheese. Bake until the cheese has melted.
(Makes 6 Servings)